LABORATORIO 6
DESCRIPCIÓN DEL LABORATORIO :
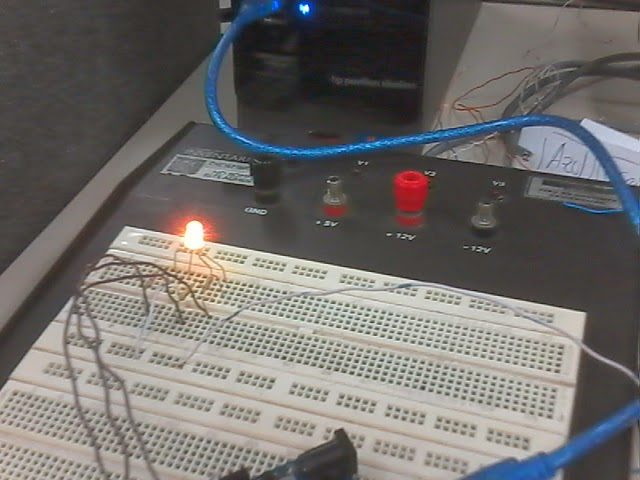
Controlaré a través de Arduino un LED RGB puesto en una protoboard, vía PWM con una interfaz gráfica en Processing/ControlP5 para controlar el valor de cada color.
DIAGRAMA DEL MONTAJE EN LA PROTOBOARD

DIAGRAMA DEL MONTAJE EN EL CIRCUITO

FOTOS DEL MONTAJE
CÓDIGO ARDUINO
- // Pines usados para el RGB (9-10) todos
- // son salidas digitales PWM (~)
- int Red = 9;
- int Gre = 10;
- int Blu = 11;
- int valor = 0;
- // Ciclo para activar los tres pines como salida
- void setup() {
- pinMode(9, OUTPUT);
- pinMode(10, OUTPUT);
- pinMode(11, OUTPUT);
- //Comunicación serial a 9600bps
- Serial.begin(9600);
- }
- // Recibe la información de manera serial del processing
- // diferenciando la información del color rojo por la letra "R"
- // la información del color verde por la letra "G" y
- // la información del color azul por la letra "B"
- void loop() {
- if (Serial.available()>0) {
- char Color = Serial.read();
- if (Color == 'R'){
- valor = Serial.parseInt();
- analogWrite(Red,valor);
- }
- if (Color == 'G'){
- valor = Serial.parseInt();
- analogWrite(Gre,valor);
- }
- if (Color == 'B'){
- valor = Serial.parseInt();
- analogWrite(Blu,valor);
- }
- }
CÓDIGO PROCESSING
- // Se utiliza las librerias ControlP5 y Serial del Processing
- import controlP5.*;
- import processing.serial.*;
- // Se define la variable cP5 del tipo ControlP5
- ControlP5 cP5;
- // Se le da nombres a los tres Knob y al Serial
- Knob PerRed;
- Knob PerGre;
- Knob PerBlu;
- Serial serial;
- // Se necesitan inicializar el valor de los colores RGB
- // en este caso lo hacemos en 128
- int Red = 128;
- int Gre = 128;
- int Blu = 128;
- // Configuración inicial
- void setup() {
- size(700, 550); //Tamaño de la ventana
- cP5 = new ControlP5(this); //Crea el objeto ControlP5
- // Crea el Knob del color Rojo
- PerRed = cP5.addKnob("R")
- .setRange(0, 255)
- .setValue(86)
- .setPosition(100, 280)
- .setRadius(100)
- .setNumberOfTickMarks(20)
- .setTickMarkLength(8)
- .setLabelVisible(false)
- .setColorForeground(color(255))
- .setColorBackground(color(0))
- .setColorActive(color(255, 0, 0))
- .setDragDirection(Knob.HORIZONTAL)
- ;
- // Crea el Knob del color Verde
- PerGre = cP5.addKnob("G")
- .setRange(0, 255)
- .setValue(128)
- .setPosition(250, 110)
- .setRadius(100)
- .setNumberOfTickMarks(20)
- .setTickMarkLength(8)
- .setLabelVisible(false)
- .setColorForeground(color(255))
- .setColorBackground(color(0))
- .setColorActive(color(0, 255, 0))
- .setDragDirection(Knob.HORIZONTAL)
- ;
- // Crea el Knob del color Azul
- PerBlu = cP5.addKnob("B")
- .setRange(0, 255)
- .setValue(170)
- .setPosition(400, 280)
- .setRadius(100)
- .setNumberOfTickMarks(20)
- .setTickMarkLength(8)
- .setLabelVisible(false)
- .setColorForeground(color(255))
- .setColorBackground(color(0))
- .setColorActive(color(0, 0, 255))
- .setDragDirection(Knob.HORIZONTAL)
- ;
- String puerto = Serial.list()[0];
- serial = new Serial(this, puerto, 9600);
- }
- // Se dibuja cada frame
- void draw() {
- background(0xFF444444); //Color Gris del fondo
- fill(Red, Gre, Blu);
- rect(50, 90, 600, 415);
- fill(0xFF444444);
- rect(55, 95, 590, 405);
- fill(Red, 0, 0);
- ellipse(200, 380, 220, 220);
- fill(0, Gre, 0);
- ellipse(350, 210, 220, 220);
- fill(0, 0, Blu);
- ellipse(500, 380, 220, 220);
- fill(Red, Gre, Blu);
- textFont(createFont("Gill Sans Ultra Bold", 65));
- text("Led RGB", 180, 70);
- fill(Red, 0, 0);
- textSize(30);
- text("Red", 60, 490);
- fill(0, Gre, 0);
- textSize(30);
- text("Green", 445, 135);
- fill(0, 0, Blu);
- textSize(30);
- text("Blue", 350, 490);
- fill(255);
- textSize(25);
- text("Juan Camilo Fernández López", 190, 540);
- }
- // Como se va a actuar cuando ocurra un evento con los Knobs
- void controlEvent(ControlEvent evento) {
- String nombre = evento.getController().getName();
- int valor = int(evento.getController().getValue());
- serial.write(nombre + valor);
- // Guarda el valor en la variable para cada color,
- // cuando se usa cada Knob
- if (nombre == "R") {
- Red = valor;
- }
- if (nombre == "G") {
- Gre = valor;
- }
- if (nombre == "B") {
- Blu = valor;
- }
- }

.jpg)


No hay comentarios.:
Publicar un comentario